Do you have many items you need to add to your inventory? Instead of adding them one by one, you can import all items from an Excel file at once. This saves you a lot of time and makes setting up your inventory much easier.
In this article, we walk you through the entire import process, from uploading the file to mapping columns and starting the import.
Getting started
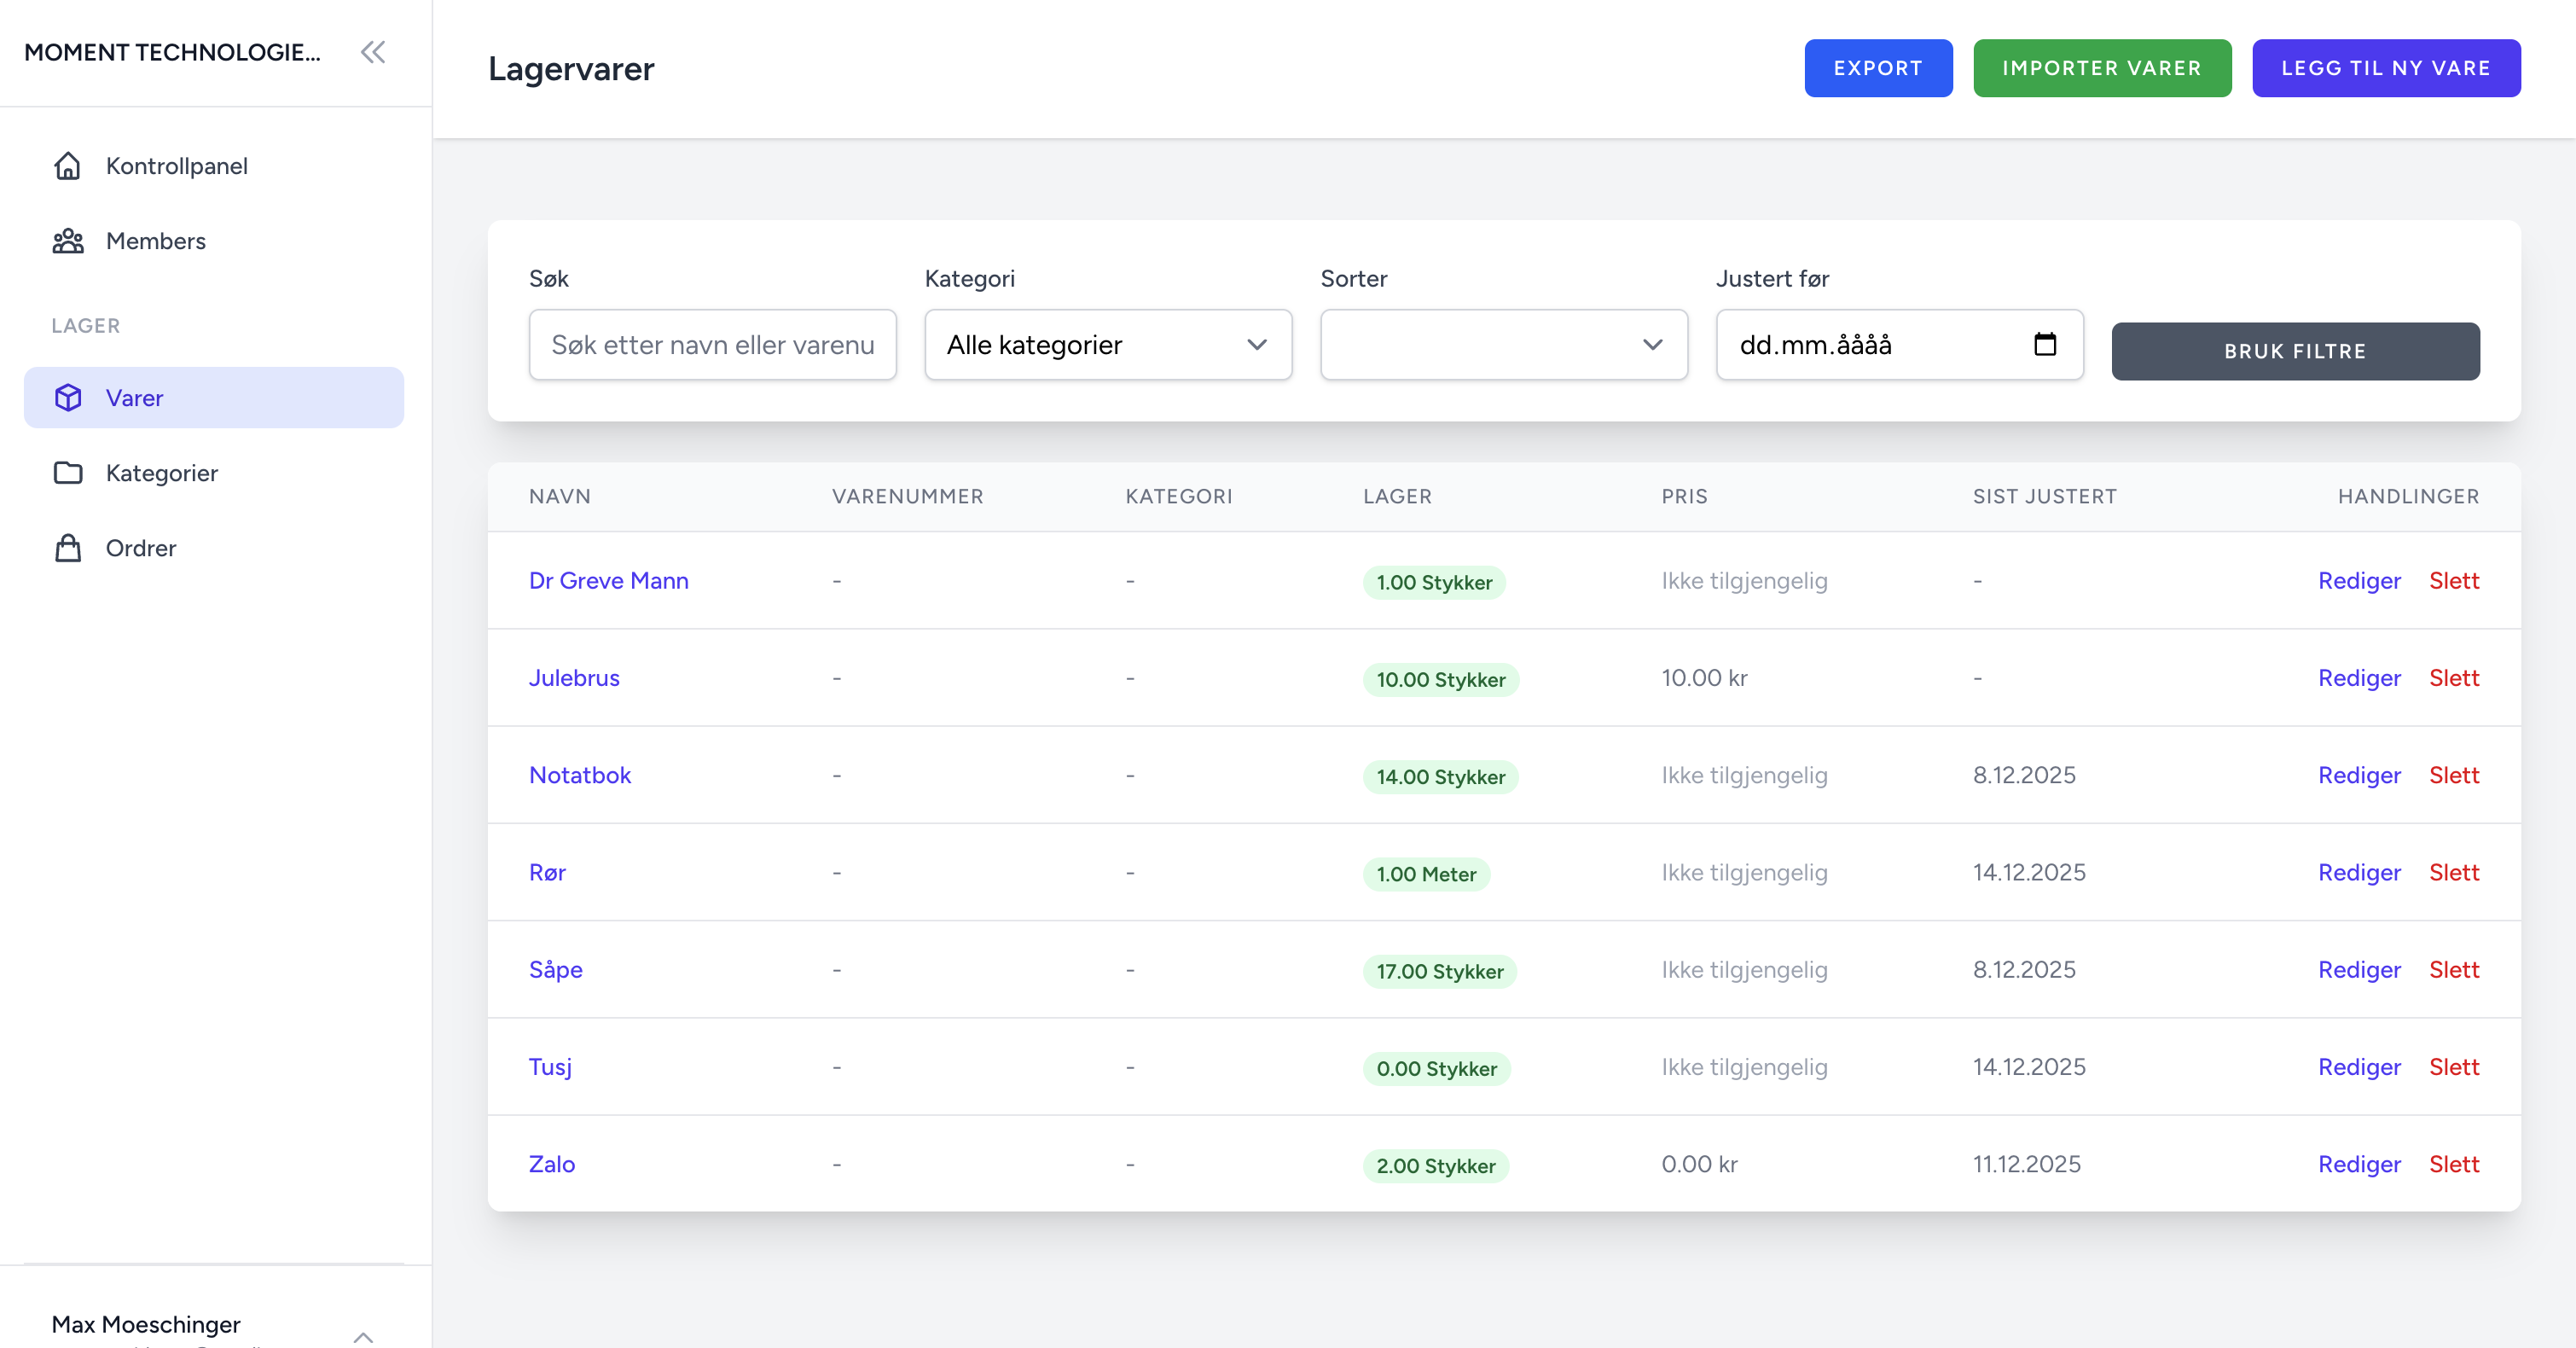
The import function can be found on the Inventory page. Here is how to get started:
- Go to the Items page
- Click the Import items button in the top menu
- You will now see the import page with a file upload area
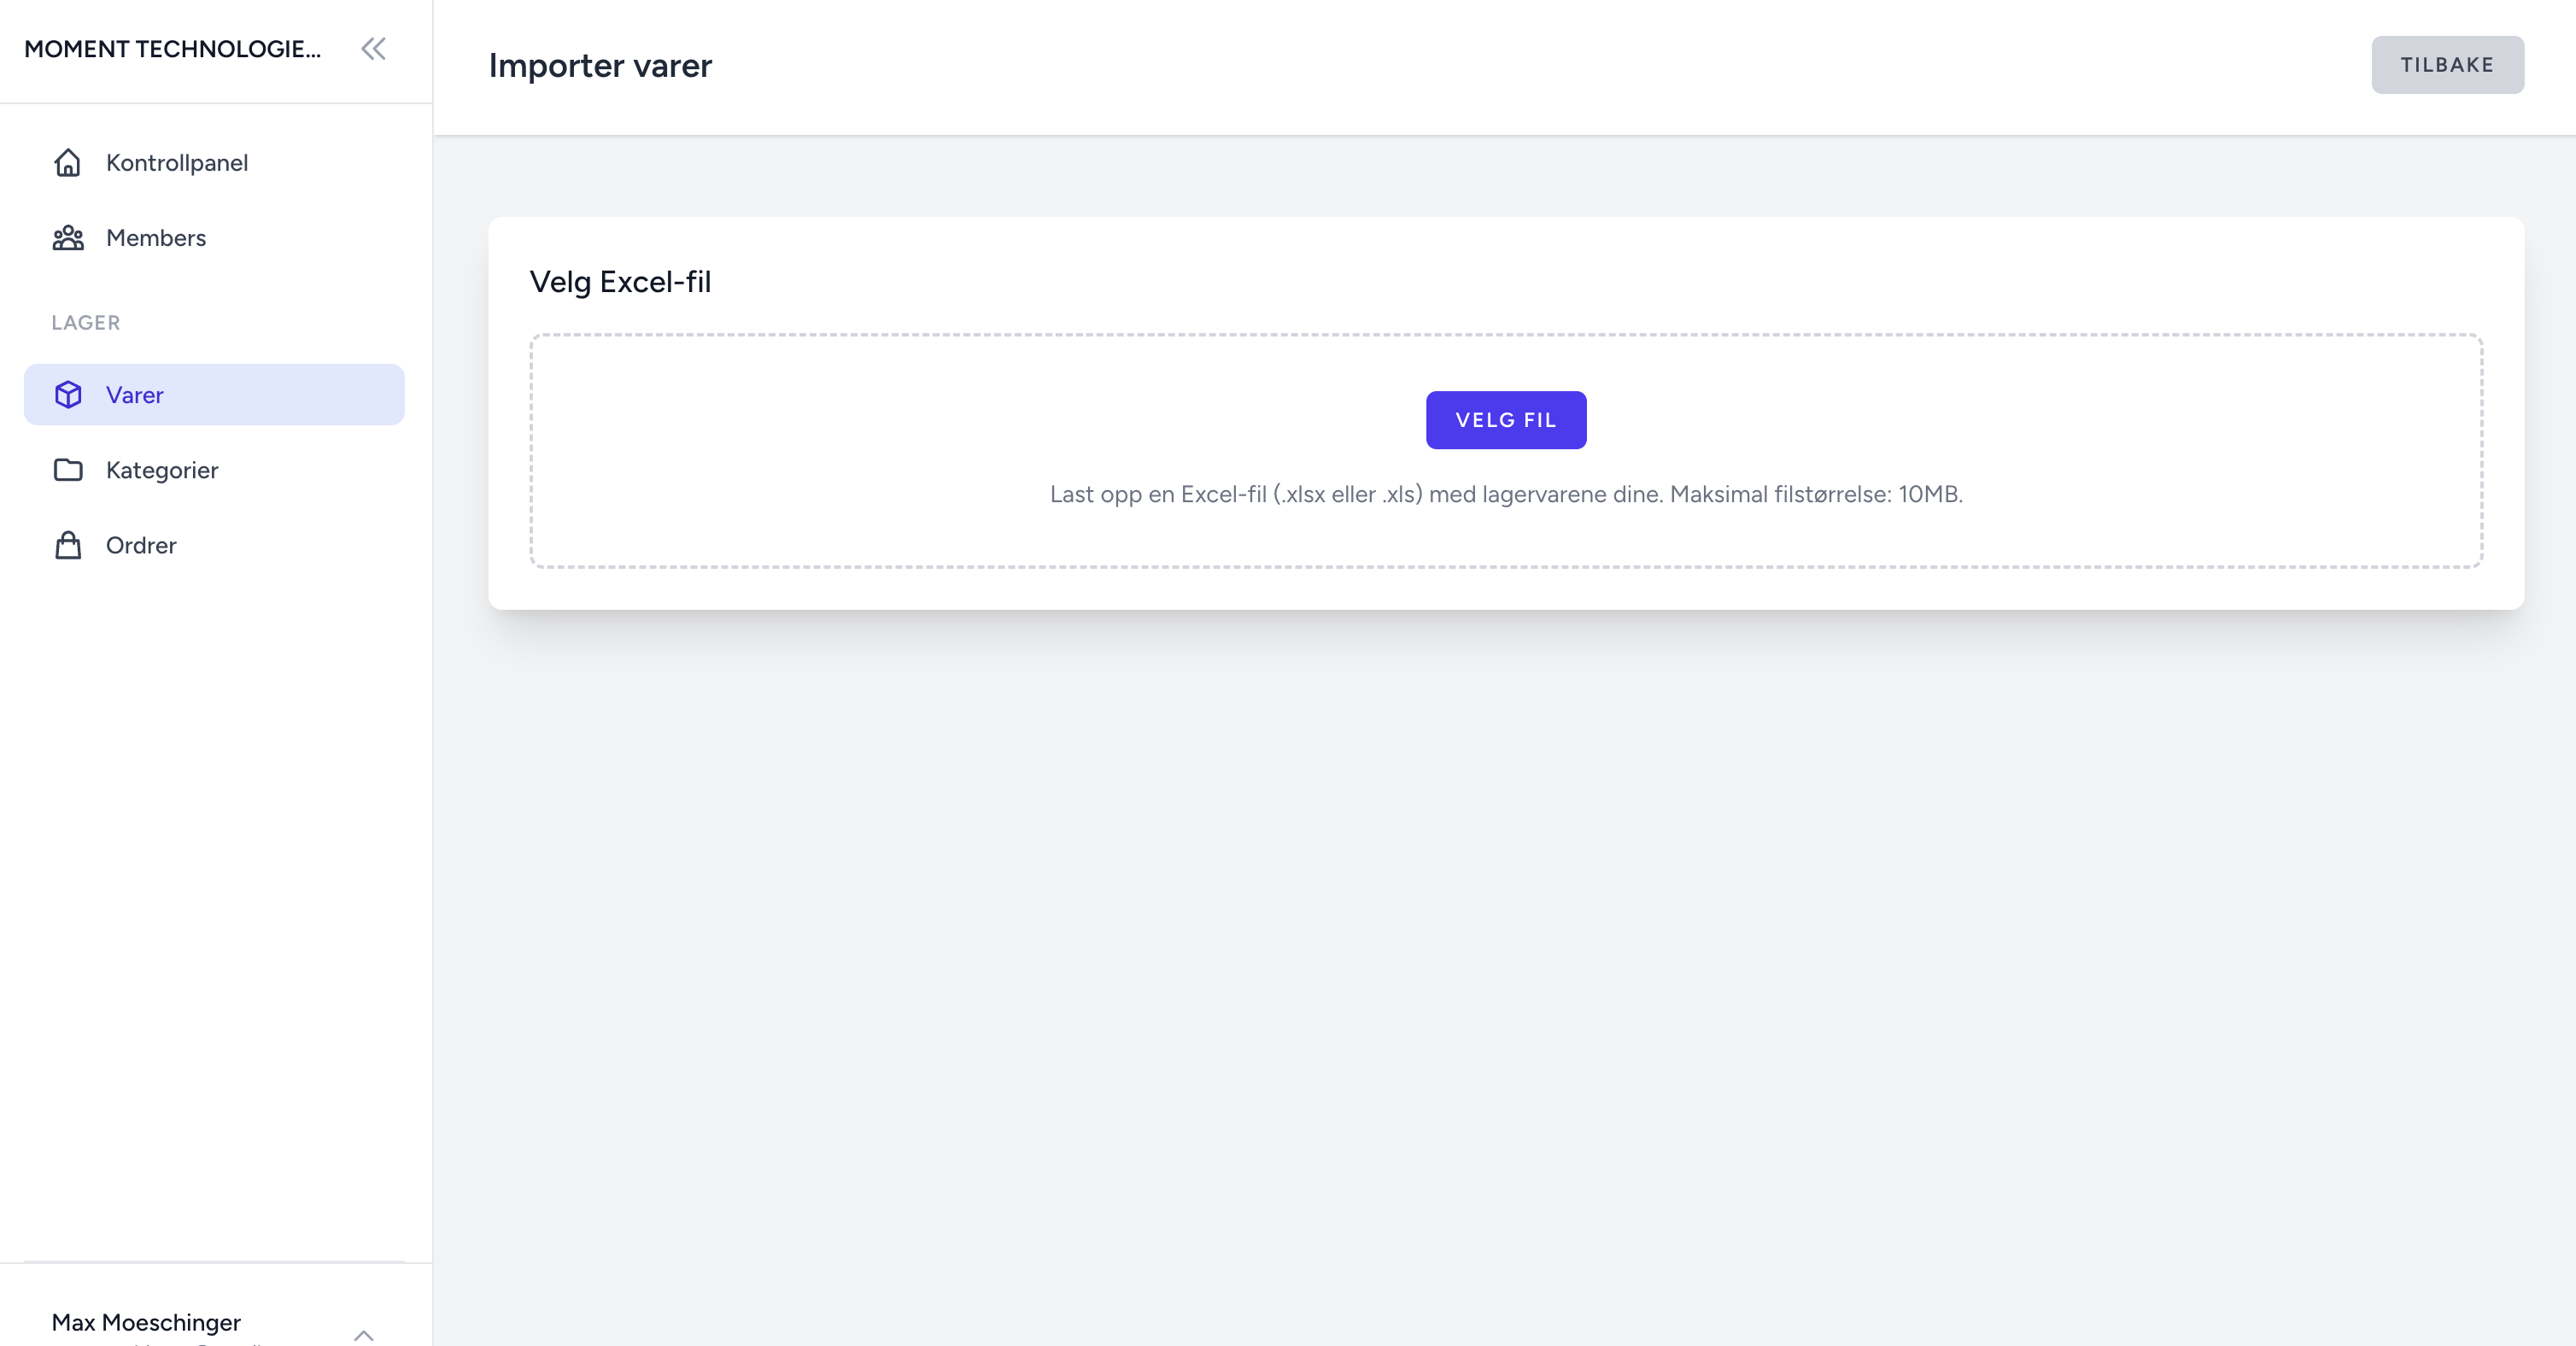
Step 1: Upload your Excel file
The first step is to upload your Excel file with the items:
- Click "Choose file" and select your Excel file (.xlsx or .xls)
- Maximum file size: 10MB
- The system processes the file and shows a preview
Tip: Make sure your file is in Excel format (.xlsx or .xls). CSV files are not directly supported, but you can open them in Excel and save as .xlsx.
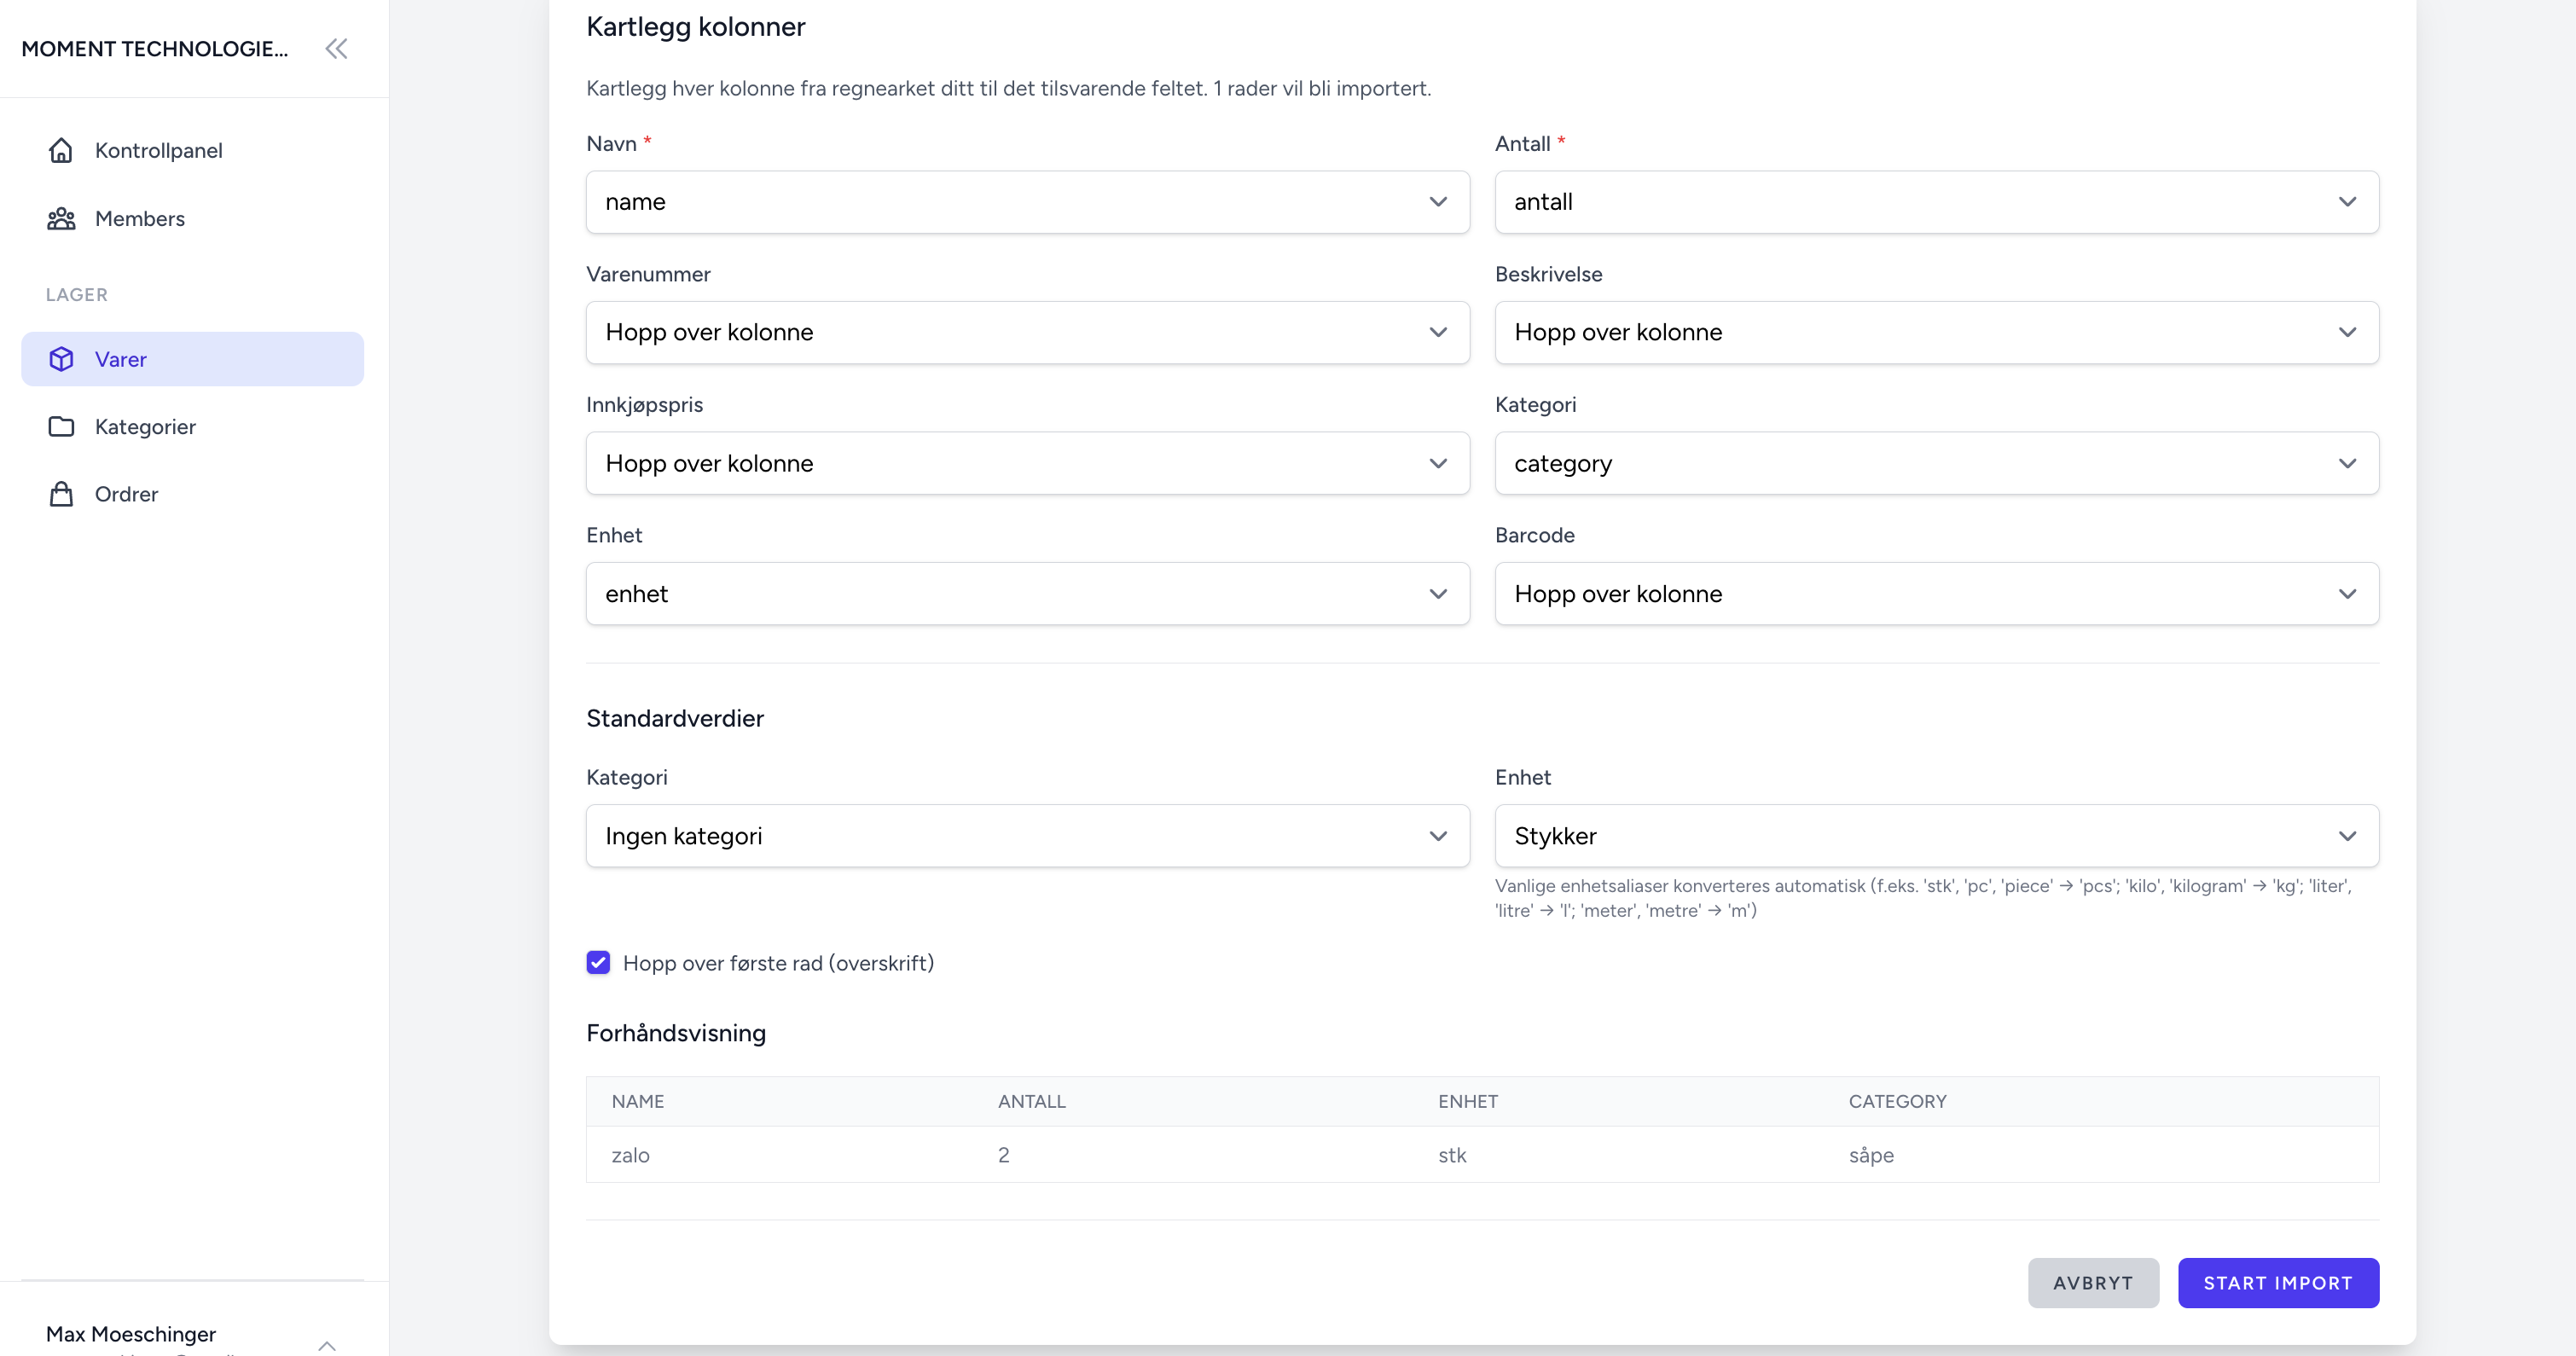
Step 2: Map your columns
After uploading, you will see a mapping screen where you can connect Excel columns to item fields in the system.
Column mapping
You need to map Excel columns to item fields:
- Name (required): The item name
- Quantity (required): Stock level
- SKU (optional): The item's SKU number
- Description (optional): Item description
- Purchase price (optional): Purchase price
- Category (optional): Item category
- Unit (optional): Unit of measure (pcs, kg, l, m)
- Barcode (optional): Barcode/EAN
The system automatically tries to recognize common column names (supports both Norwegian and English). You can adjust the mapping as needed.
Examples of automatically recognized column names:
- Name: "Navn", "Vare", "Produkt", "Name", "Product", "Item"
- Quantity: "Antall", "Kvantitet", "Beholdning", "Quantity", "Stock", "Qty"
- SKU: "SKU", "Varenummer", "Artikkelnummer", "Item Number"
- Barcode: "Strekkode", "EAN", "Barcode", "Barcode"
Default values
You can set default values for items that do not have these values in the file:
- Default category: Applies if no category column is mapped or a row is missing a category
- Default unit: Applies if no unit column is mapped or a row is missing a unit. Options: pcs, kg, l, m
Skip first row
Enable this if the first row in the file contains headers (recommended). This is the default for most Excel files.
Preview table
A preview shows up to 10 rows so you can verify the data before importing.
Tip: Check the preview carefully before starting the import. This helps you catch any issues early.
Step 3: Start the import
Once you have reviewed the mapping and preview:
- Review the mappings and preview
- Click "Start import"
- The system processes each row and creates items
What happens during the import
The system does the following for each row:
- Validates each row: Checks that required fields are filled in and that the data is valid
- Creates categories automatically: If a category does not exist, it is created automatically
- Normalizes unit values: Converts common variants (e.g., "piece", "stk", "stykker" → "pcs")
- Skips rows with errors: Rows with missing names, invalid data, or duplicate SKU/barcode are skipped
- Shows a summary with:
- Number of items imported
- Number of rows skipped
- Error details (up to 10 errors)
Tips for a successful import
Follow these tips to ensure a smooth import:
1. Use a header row
Include column names in the first row. This makes it easier for the system to recognize the columns automatically.
Example:
Name | Quantity | SKU | Category | Unit | Barcode
2. Required fields
Make sure the Name and Quantity columns are mapped and that all rows have values in these columns.
3. Units
Use standard units (pcs, kg, l, m) or let the system normalize them. The system recognizes common variants such as:
- pcs, stykker, piece, pieces, stk
- kg, kilogram, kilo
- l, liter, litre
- m, meter, metre
4. Categories
Map a category column or set a default category. This makes it easier to organize items after import.
5. Duplicates
Make sure SKU and barcode values are unique. The system will skip rows with duplicate values.
6. Data format
- Use numbers for quantity and price
- Use text for names and descriptions
- Avoid special characters that may cause problems
Common problems and solutions
"Missing name" error
Problem: A row is missing a name or the name column is not mapped.
Solution: Make sure the Name column is mapped and that all rows have a name.
"Invalid unit" error
Problem: The unit value is not recognized or is invalid.
Solution: Use standard units (pcs, kg, l, m) or set a default unit in the import settings.
"Item already exists" error
Problem: The SKU or barcode is already in use.
Solution: Remove duplicates from the file or update existing items manually before importing.
The import seems slow
Problem: Large files take time to process.
Solution: This is normal for large files. Wait for the completion message. The system processes files sequentially to ensure accuracy.
After the import
After a successful import, you will be redirected to the Inventory page with a success message showing how many items were imported. You can then view, edit, or manage your items as usual.
Tip: After importing, it may be a good idea to:
- Review the imported items to make sure everything looks correct
- Add missing information (e.g., images or more detailed descriptions)
- Organize items into categories if you did not do so during the import
Important information
Note: The import only processes the first sheet in your Excel file. If you have multiple sheets, you need to combine them or import them separately.
Conclusion
Importing items from Excel is a powerful feature that can save you a lot of time when setting up your inventory or adding many items at once. By following this guide and our tips, you can easily import hundreds or thousands of items in minutes instead of hours.
If you want to learn more about other features in Momentech, you can read more about simple inventory management or how to reduce inventory errors.
Do you have questions about importing or need help? Contact us and we will help you further.